Showing posts with label recipes. Show all posts

Wednesday, April 2, 2014

Pressure cooker experiments


Pressure cooked Quince

The idea was to start with a raw quince, pressure cook it with butter and brown sugar and end up with nice soft, well-cooked quince... And it didn't really work. I think it was a question of time and maybe I need to add more liquid... I'll try again.


Pressure-cooker Garlic Confit

This was far more successful. I make two versions; one out of fermented garlic, and one out of raw fresh green garlic. I added butter to the olive oil in the fermented garlic version, and balsamic vinegar to the fresh garlic one. Both worked beautifully at full pressure cooked for 1 1/2 hours.


Sunday, March 30, 2014

Blood Orange Syrup & Vinegar

I was given a small bag of blood oranges and a grapefruit from a friend's yard last week. And not wanting to waste such a gift (one of my favorite aspects of living in San Diego is all the fresh fruit available for free or nearly so. More to come on that subject...) I made some blood orange syrup and with the rinds I started a batch of blood orange vinegar.

Blood Orange syrup

6-8 blood oranges
1 small grapefruit
4 key limes (or any limes)
1 cup brown sugar

I juiced all the citrus and ended up with about 400ml (about 1.75 cups). I strained the juice in to a non-reactive pan, stirred in the sugar and brought it to a boil. I simmered for 5 minutes, then strained again into small canning jars. Wiped the rims, put the lids and bands on, then processed in a water bath for 10 minutes.

AND...

*Preview of my Fermentation Class, April 17th at the Center for Living Peace, Irvine, CA*

With the citrus skins I started a batch of blood orange vinegar.

Blood Orange Vinegar

Rinds from all the citrus above
1 cup brown sugar dissolved in 3 cups of water

Pack the rinds in a large, clean glass jar. Pour over the sugar water, and add enough water to cover the rinds completely. Cover with a double piece of cheese cloth secured with a rubber band. Store in a cool dark place and check weekly. After a few days you should see bubbles when you move the jar. This means that the sugar is fermenting which is what you want. When the bubbles cease, add 1/4 cup non-pasteurized apple cider vinegar, recover with the cheesecloth and return to the cupboard. Now the alcohol will be converted in to acetic acid, aka vinegar. Filter and strain into bottles, close with a cork.

Fresh Pasta, Tomato sauce and Chicken Cutlets

** Preview of my Pasta Class, June 26th at the Center for Living Peace, Irvine, CA


New Pasta Roller for my KitchenAid Mixer


So after many many years of using the old-fashioned, hand crank pasta makers I have finally come into the 20th Century (yes, these are not new by any means.) Because I need or the roller to be easily transportable and usable in a variety of settings, including those lacking a true "ravioli" table like my grandmother, Mimi, had, I finally decided to go electric.

It arrived around 4 PM and I had pasta dough rolling through it about 30 minutes later!

Rolling out dough can be a bit daunting. Over the years, I've learned a few tricks to help. First after making the dough rest for 30 minutes or so. Don't put it in the fridge or you'll have to then wait for it to warm up before rolling it out. Cut a piece just larger than an egg. Set the rollers to 1, the thickest setting, and start the machine (or crank the old-school one) Feed the dough in slowly. It won't look like pasta yet; more like a slightly flattened lump. Fold the dough in half, flour heavily, and feed through again. Repeat this until it smooths out. Now go to setting 2 and repeat. For noodles I usually go to 4 for filled pasta I go to 5 or 6 depending on my dough that day. When you're happy with the piece, flour both sides heavily, and fold in half, then quarters, then eighths. them cut the pasta to the desired width. For this wide noodle I opened the pieces up and curled them into nests, dusted with more flour. I froze half the batch on a small sheet pan.
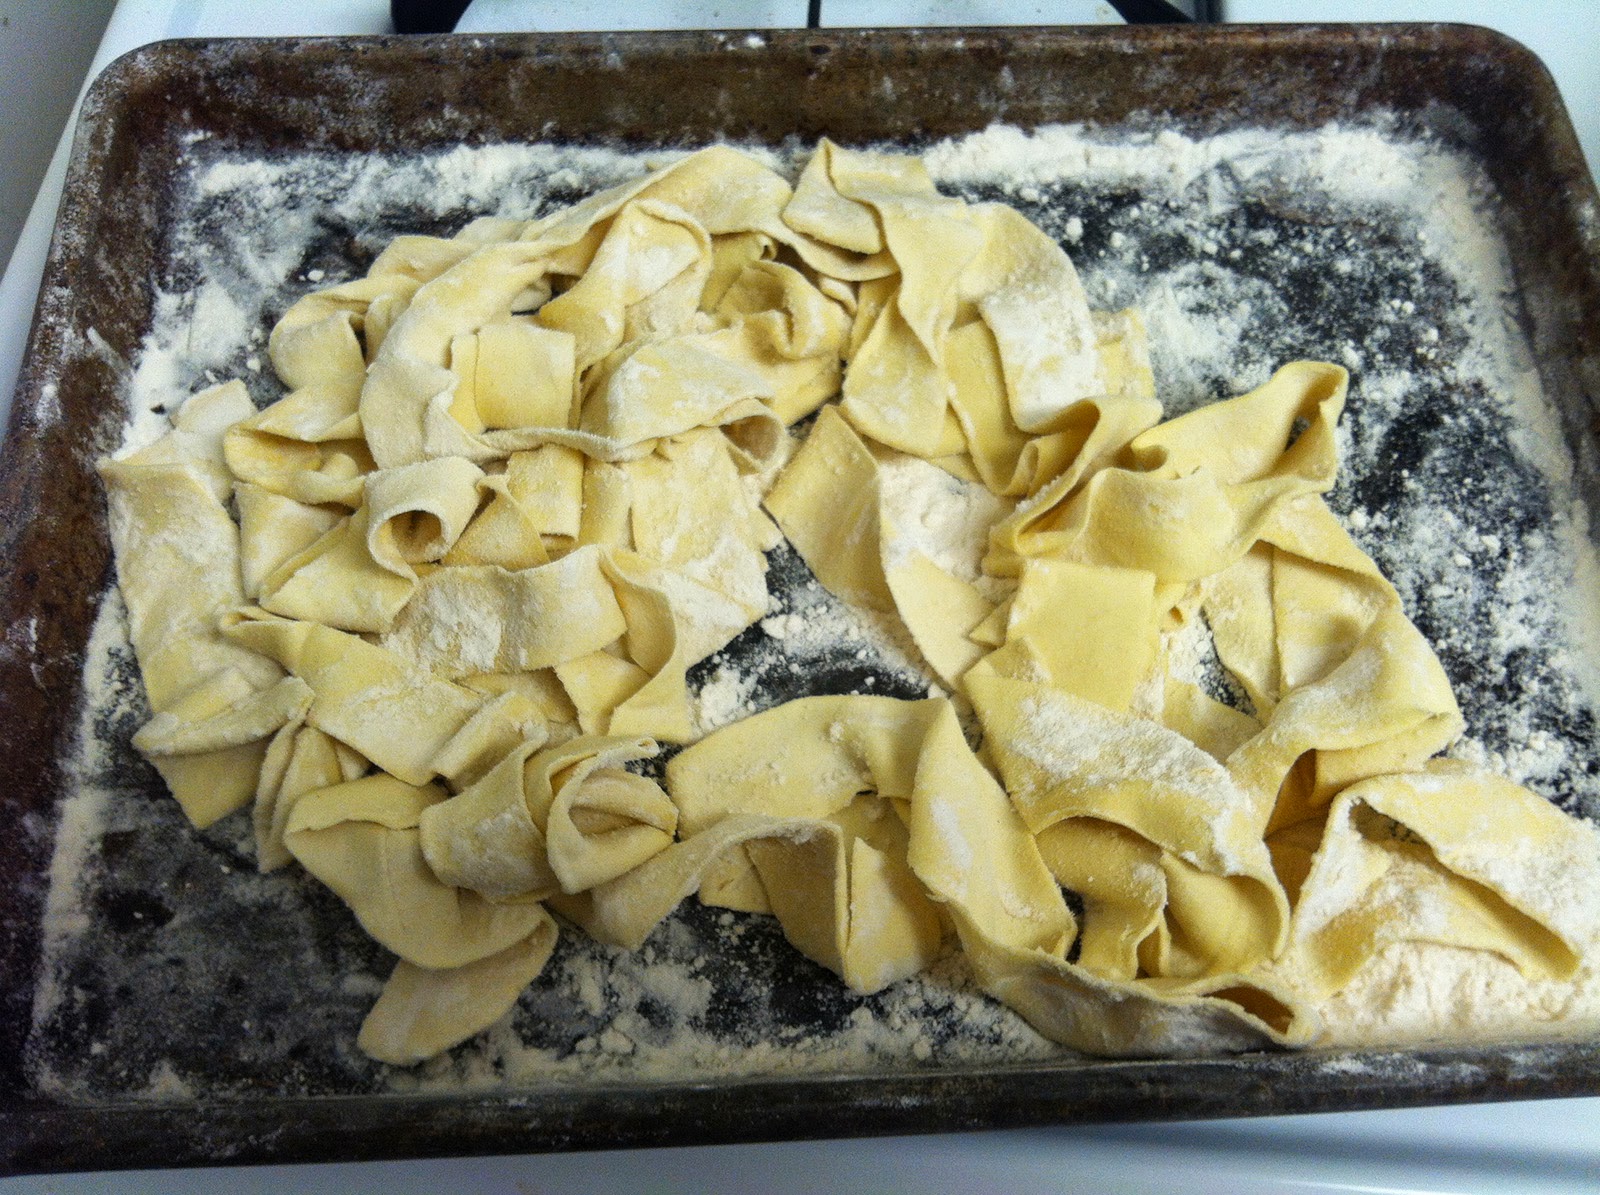
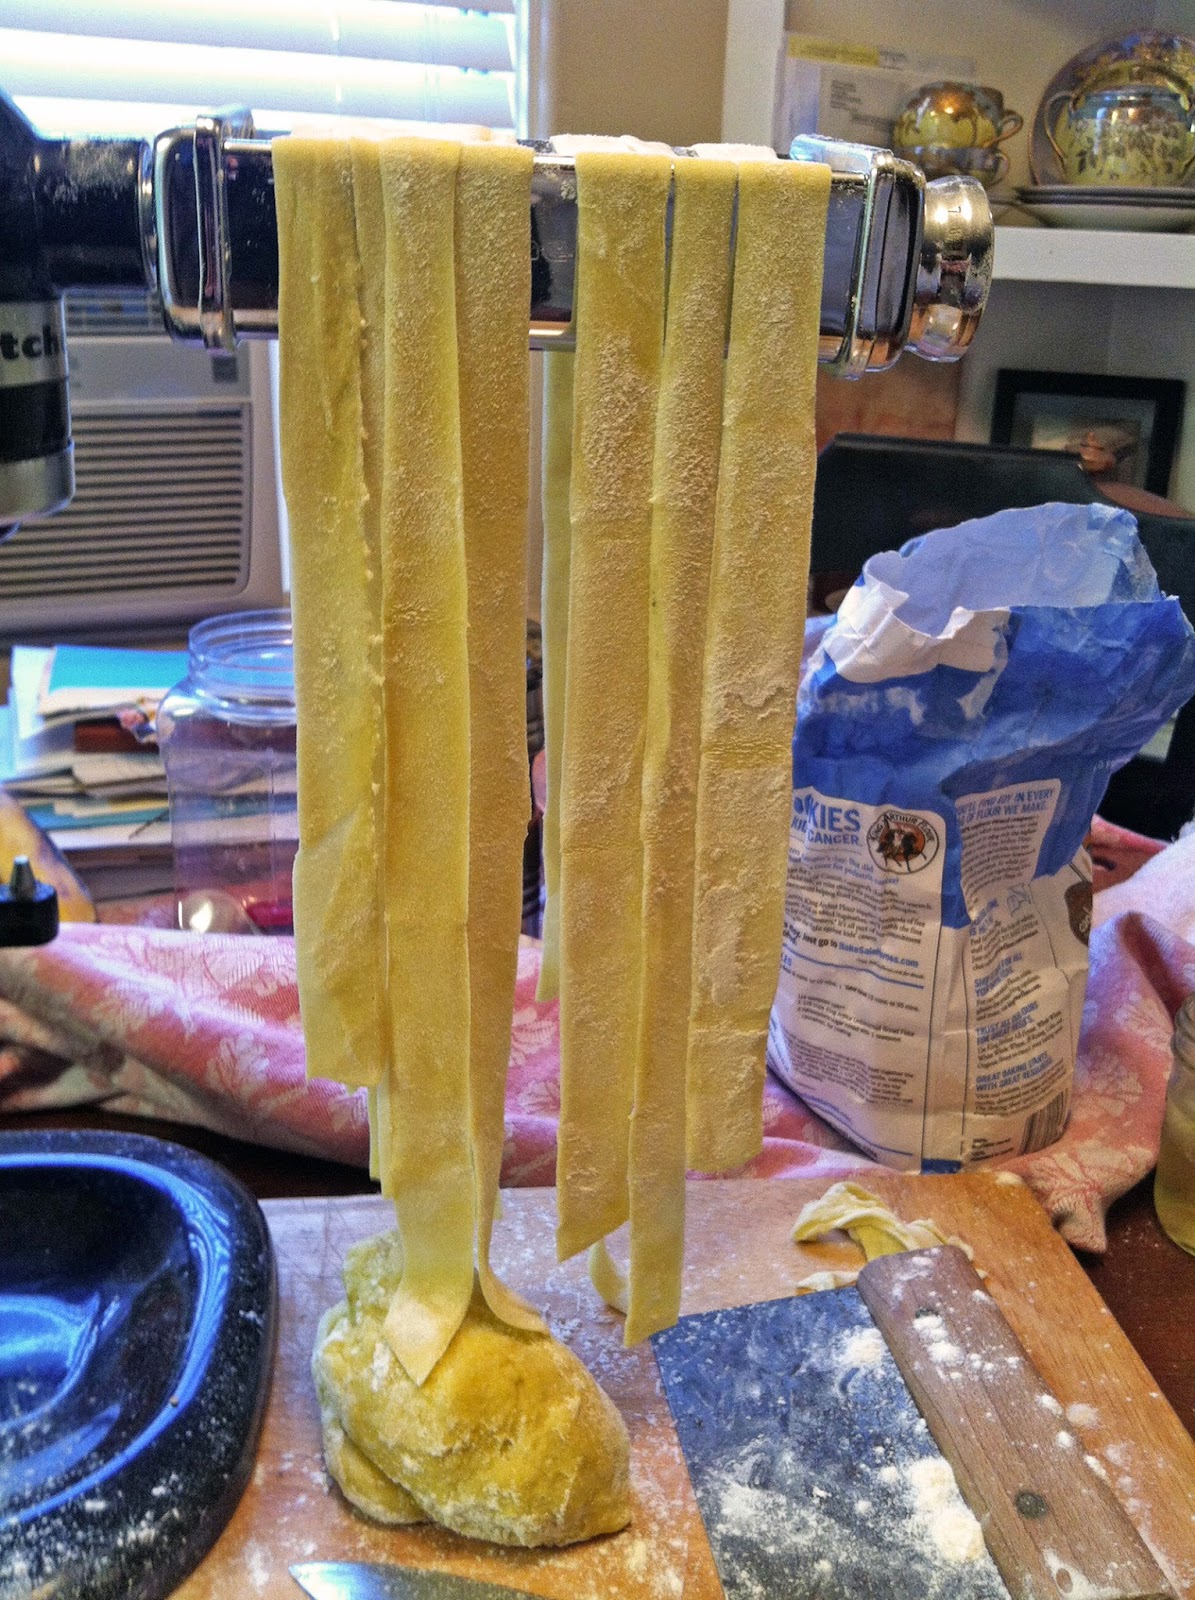
 You can also hang them to dry over a broom stick or with one of the cool pasta drying racks out there. I the end I was very happy with the quality and ease of the pasta. Below are the recipes for the pasta, tomato sauce and my chicken cutlets...


My basic pasta

2 cups of all-purpose flour
1 tsp. salt
2 eggs
water or olive oil

Mix the salt in the flour in the bowl of a mixer, food processor or if going old-school in a mound on a large board. Beat the eggs for a second and add to the flour. With the electric machines, they can be running or not. It takes longer if they are not but the process is actually much closer to the hand-made process. For the old-school method, make a depression in your pile of flour, add the mixed eggs, and then using a fork, slowly combine with a circular motion. It takes practice, and even Mimi, (she never wanted to be "grandma" or any other similar name) agreed that the power tool pasta was as good, or close enough to, the hand-made. Plus it takes a fraction of the time. Finally if the dough still seems a little dry add very small amounts of water or oil until you get a nice smooth dough. If it seems wet, remember a lot of flour gets worked in during the rolling.

Quick Creamy Tomato Sauce

28 oz whole tomatoes
5 cloves garlic, smashed
Bunch of scallions, chopped using the white and some green...
Olive oil
1 tsp. fish sauce
1 tsp. balsamic
1/8 cup or a handful, whole leaf mixed fresh herbs
1/2 cup sour cream
Heat oil. Brown garlic and scallions. Stir often so the garlic doesn't burn. Add the whole can of tomatoes with liquid and the fish sauce/balsamic. It will be very watery. Do not despair.
Reduce heat and simmer for 20 mins. Stirring often and breaking up tomatoes with a wooden spoon. The sauce will remain chunky. When the sauce is reduced stir in the sour cream and stir to blend. Finally stir in the herbs and serve.


Chef Jeff's Famous Chicken Cutlets

2 chicken breasts, on the bone*
2 eggs
2 cups flour
2 cups breadcrumbs, panko, unseasoned store bought, or homemade
salt and pepper

*I always try to purchase meat especially chicken on the bone. It is much cheaper by the pound and the skin and bones can be saved to make stock essentially for free!

Remove the skin from the breasts. With a sharp kitchen knife, starting at the pointed end of the breast, cut horizontally (parallel to the cutting board) to get thin 1/2" slices. Repeat until all are done. Spread them out on a plate and prep the eggs and crumbs.

I usually season the crumbs rather than the chicken. Salting the meat tends to draw out moisture, dry the meat out and can lead to the moisture leaking out and making your crust slide off. You can add fresh or dried herbs, garlic powder or whatever other flavorings you like.

Next beat the eggs with a splash of water until well combined. Set up three bowls, one each for the flour, eggs and crumbs. Dip the first cutlet into the flour making sure it's well covered, then the eggs, and then the crumbs. Repeat until all are done and set aside on a large plate in a single layer. At this point I usually wait 10 minutes or so, to allow the crust to set. Next heat a Tbsp of oil in a fry pan, and cook the chicken until crispy and cooked through, about 4 minutes per side depending on thickness. Serve with tomato sauce, pesto or even BBQ sauce.

Sunday, December 15, 2013

Co-op Thanksgiving... Before...


Compound Butter for the Smoked/Roasted Turkey 

1 stick Unsalted Butter, room temp
Grated peel of one Meyer lemon 
2 Tbsp minced mixed fresh herbs 
(I used marjoram. rosemary and lemon thyme)
Combine all ingredients in a bowl. Take the turkey out of its wrapper and pat dry. Place on a rack set over a cookie sheet. Sprinkle with Kosher or sea salt and return to the fridge overnight. In the morning, remove the turkey from the fridge to warm up for 2-3 hours. Put 3-4 cups of wood chips in a bowl of hot water. Meanwhile set up the grill to smoke the bird. I use my Weber Kettle grill by making a small fire on one side with lump charcoal. Once the coals are hot I remove the small grate so the coals fall to the bottom of the kettle. I put the large grate on and add 1 cup of the wet wood chips, and set the turkey on the cool side of the grill. Cover and allow to smoke for 10 minutes. After 10 mins check the bird to be sure it isn't burning. Flip the bird and continue to smoke for another 10-15 mins depending on how much smokiness you desire. Meanwhile preheat the oven to 375º. Remove the bird from the grill and put in a cast iron frypan or heavy bottomed roasting pan. Pop the turkey in the oven and roast normally. I tend to roast turkey for 20 minutes on a side before I flip it and roast another 20 mins. Roast until it reaches 160º-170º remembering that it will add another 10º after it comes out of the oven.

Saturday, October 5, 2013

Breakfast Bacon Varieties... Including Beef Bacon

My Breakfast Bacon uses the regular dry cure with addition of additional brown sugar and blackstrap molasses. For the October 10th class I am experimenting with both pork belly and beef shortribs.. I have tried the beef bacon before but it turned out too salty, though it was remarkably bacon-like. 

I cut the ribs off (save them OF COURSE! Never throw out flavor!! Great for stock, soup, etc...). Then dredged in the cure, and into the bag with extra sugar and molasses. The meat is a little thinner than a usual pork belly so I'll cure it for only 4 or 5 days.


Here's what the finished beef bacon looked like the first time... (the photo color is a bit too red...)


Bacon Varieties...


For my "Bacon, Bacon, Bacon" class, I've decided on Sicilian and Moroccan as the two "regional flavors." Of course not much bacon is consumed in Morocco, but the spices (tumeric, garlic, sumac, za'atar, and Marrakech Moroccan Spice from Savory Spice (www.savoryspiceshop.com/blends/marr.html) are so good with grilled or smoked meats.

For the Sicilian I used garlic, oregano, dried onion, orange peel and my foraged fennel pollen. I'll do a fennel pollen foraging post later in the year. It's one of my favorite parts of living in SoCal.